Wednesday, June 19, 2013

Avoid wastage and give a longer fridge life for your greens and fruits

Find your greens gone bad after a week in the refrigerator? the same case for your strawberries and coriander / parsley? I faced the same thing, when I had to buy greens and when you buy in places Costo or Bj's or any other wholesale you tend to get it in huge quantities, it may work well for large families or family with kids.For just the two of us I always stored the remaining in the fridge and found it gone bad after 4 or 5 days. Here is a simple tip to increase the life time in double for all your greens and also your strawberries. Many of my friends have told me strawberries go waste in just 3 days when I buy it and I don know what to do. I tell them all the same tip. All you need is just a few kitchen towels / paper towels and you are good to go.
I have just added some pictures of how to store then remaining and make its fridge life longer. I am doing it with arugula and it goes good with spinach,kale,coriander,parsley,strawberry actually anything that hates moisture. All these fruits and veggies hate moisture. When we let them sit in the fridge you might have noticed moisture on top of the lid, this causes them to go bad so we need to keep the moisture out by adding layers of paper towel.So this helps in absorbing all the moisture build up and helps all your greens and herbs stay much longer actually double the fridge life than usual.If the quantity is more  give 2 or 3 layers and you are good to go. It might take a few minutes but its a useful use of the few minutes and reduce wastage and save a lot.
The below pictures explains the process.


Monday, June 17, 2013

Chilly chicken bites

I love the chili chicken bites  my mom made. These were always accompanied with chicken biriyani and it was a real treat. After I got married I never had it and until one day I badly wanted to eat them and decided to do them my style because I forgot how my mom made them. My husband told me he has never had them and I was surprised because I have had them for as long as I can remember. After that one time I don know how many times I have made them for him in the last two months.He insisted on having it on the game day Yesterday. So I made a big bowl of my chicken bites for the game. These are kind of Indian popcorn chicken.


He even mentioned to me that we should think about selling them here in the US. Hmmm now I know how much he likes them. So I made him my chicken bites and a bowl of fried chicken nuggets for myself!
Since my husband love this so much I wanted to feature this recipe. I have never written this recipe down until today. So here is the recipe for my famous chicken bites.
I used boneless chicken cut into nuggets, but you can use chicken with bone also. I used chicken tenderloins.


Chili chicken bites
Ingredients
Chicken cleaned,cut into nuggets - 1 cup, nearly 225 grms
Ginger garlic paste - 1 tbsp
chili powder - 1 1/2 tbspn
Pepper powder - 1 1/2 tbspn
Cumin powder - 1/2 tspn
Tomato Ketchup - 1.5 tspn (optional)
Lemon - 1/2 tspn
salt - 1/2 tspn ,use according to taste
Cornflour - 1 to 2 tbspn
Semolina / White Rava - 1/2 tbsp
Water - 1 tbspn
Oil for deep fry

Method:
Heat oil in the pan
Add the ginger garlic paste, the spices,ketchup,lemon juice,half the amount of salt and mix together.
Taste and check for salt.If less add the required salt.
Add the cornflour and mix well.
Add the chicken and coat with masala. If it appears very thick, add little water and mix to the right consistency that all the masala stiks to teh chicken.
Add the semolina and mix with the chicken.
Deep fry in oil for 5-6 minutes or until the masala turns deep red in colour.

Friday, June 14, 2013

Low calorie spicy spinach and artichoke dip

Big fan of spinach and artichoke dip? then you will adore this low calorie spinach and artichoke homemade dip. When you order in restaurants it appears as a humble dip but you are gobbling up lots and lots of calories. When you make it at home you can control what goes in and how much goes in, so homemade dips are an easy way to keep a check on calories plus you get to enjoy what you really like. There are so many versions of this dips, this is my version of the dip.It doesn't have mayo or sour cream, so if you are a calorie counter , this is the dip for you. Plus it doesn't have a huge amount of cheese but it does taste cheesy.


This dip is cheesy,hot, gooey and spicy. It is my version so I made it spicy for my husband. My husband doesn't like cheese. I know! who doesn't like cheese????? He removes cheese from pizza and east them??!! how about that.. plus reaches to my pizza and tries to remove mine too!!!! 
I have tried to give him cheese in a variety of ways, but he is like a dog sniffing a bone, he finds out that it contains cheese and that's why you would have seen a series of valentines day Italian dishes without cheese!
Here is the recipe.. try it you will love it too..
I am making a white sauce instead of mayo and sour cream and add the spinach and cheese to them. Use any kinda of cheese you like, which melts better like Parmesan.


Low calorie Spicy spinach and artichoke dip Serves 4-5

Ingredients:
Spinach - 1/ 2 bag (frozen or fresh) if frozen thawed
Artichoke canned,chopped - 3 hearts
Garlic cloves,chopped - 2
Garlic powder - 1/2 tsp (optional)
Cayenne pepper - 1/4 tsp
Red chilly flakes - a pinch
Cheese grated - 1/3 cup
Salt to taste
For the white sauce or rue
Milk - 3/4 cup and little more if needed
Plain flour - 1 tbsp - 2 tbsp
Oil - 3 tsp

Method:
Heat pan and add 1 tsp of oil. Add the chopped garlic and the chopped artichoke and cook for 5 minutes until the artichoke is slightly browned. 
Add spinach and cook them for a couple of minutes until the spinach has wilted down.Remove them and squeeze the excess water from the spinach and artichoke and chop then.
Remove them from pan and using the same pan over medium heat add the other 2 tsp of oil, and 1 tbsp of plain flour and toss the flour around until the raw smell goes off and it becomes a paste and let it cook for 2 minute.
Add the milk and be sure to  dissolve the flour in the milk,and let it cook for 2 minutes. If the mixture is too watery add more flour or if too thick add a little more milk.
Be sure to cook the flour and dissolve it in the milk. add the garlic powder, cayenne pepper and chili flakes and mix.
Add the cheese and stir until it dissolves.Add salt and taste.
Add the chopped spinach and artichoke mixture and stir to combine.
Sprinkle cheese on top if needed and put it in the oven broiler until the cheese is melted and bubbly.
Enjoy with your favorite chips or crackers.


Wednesday, June 12, 2013

Extra crispy chilly gobi / cauliflower

I apologize for not posting this recipe for a long time. Many requested for this recipe after I added the vegetable biriyani recipe, but somehow I missed to publish it. I had it all typed out but I guess got lost with other things.. So here it is after a long time.. It just takes minutes to get it ready and you cant stop eating it with just one!


Extra crispy Chilly gobi / cauliflower Serves 4

Tbsp - tablespoon
Tsp-tea spoon

Ingredients:
Cauliflower,washed and cut into bite size chunks - 2 cups
Cornflour - 1/2 cup
Ginger and garlic paste - 1 tbsp
Red chilly powder - 1 1/2 tsp
Pepper powder,coarsely ground - 2 tbsp
Cumin powder - 1 tsp
Lemon juice - 2 tbsp
Salt to taste
Water - 4 tbs (optional)
Semolina / white sooji - 1 tbs (optional)
Oil for deep fry

Method:
Heat oil in a pan.
In a mixing bowl add the ginger garlic paste,chili, pepper,cumin powder,lemon juice, and salt and mix together, without adding water.
Add the cauliflower and rub the spice all over it.
Start adding the cornflour one spoon at a time and mix well, the mixture should not be watery.We are adding the cornflour,just to absorb the extra moisture.
So once the cornflour absorbs all the moisture,stop adding it.You can add little water to bring it to the right consistency.
Add the sooji / semolina and mix through.
Deep fry and serve immediately with fresh onion and lemon.

Tips:
We are not adding any artificial color to it, so the color might be pale.Do not worry it is supposed to look like that. If your red chili powder is really red in color then you mixture will be some what of a red color.
Since we are not making a batter and dipping the cauliflower , you have to take care to rub the spice mixture all over the cauliflower.
Add cornflour 1 spoon at a time.
If the mixture is too thick, you can add water 1 spoon at a time.


Monday, June 10, 2013

Kimchi fried rice

Homemade fried rice is absolutely one of my favorite and if u are you too will love this kimchi fried rice.For those who are not familiar with kimchi, it is a Korean pickled cabbage and it is a staple in Korean cuisine.It taste sour, you might not be a fan on the first look or first bite either,but if you are a sour tooth person you will become a fan for sure. It is colorful, crunchy and sour cabbage that's all it is. I have previously made cucumber stir fry with kimchi. You can check out the recipe here cucumber stir fry with kimchi. I have been wanting to share this recipe for a long time and at last I am..

It is such a simple and a good twist on the usual fried rice we used to have. This recipe works well on left over rice too. I usually add onion and eggs and sometimes also add corn. I do not other veggies like carrot or green beans cos I want to stay true to the kimchi flavor and do not want any ingredient to over power the kimchi. The kimchi will be subtle yet you will know it is not your usual fried rice on your first bite.

I was able to get only one shot of the fried rice with my phone, the shot is not what I would prefer to post but I am left with no other. so here it is..

Just found some old photos I clicked when I cooked this fried rice.. so feast your eyes..


Kimchi fried rice Serves 4 - 5

Ingredients
Uncooked rice - 2 cups + water to cook rice.
Store bought Kimchi, chopped - 14 oz bottle
Garlic, chopped small - 5 heads
Red onion, sliced - 1
Eggs, beaten - 2
Frozen / fresh corn - 1/4 - 1/2 cup (optional)
Pepper - 3 tbs or less
Soy sauce - 1 tbsp (optional)
Salt to taste
Oil - 3 tbsp

Method:
Cook the rice as you usually do. 
Once the rice is cooked, cool the rice and fluff with a fork, do not let it become hard and into chunks.
Heat a deep bottomed pan with the oil and add the chopped onion. Cook for 5 minutes until the onions are translucent.
Add the garlic,corn,kimchi,soy sauce cook for a couple of minutes.
Add the rice, salt and pepper and toss around. Once combined make a well in the middle and add the beaten eggs and stir the eggs.
Once the eggs are almost cooked toss the rice along with the eggs and combine well until all the ingredients are combined well.
Taste for seasoning.
Serve hot or cold.

Note:
If you want to make it for 2 people just reduce the rice to one cup and kimchi to half the bottle, other ingredients can remain the same.

Thursday, June 6, 2013

10 minute donuts

Back online after a really long time.. Neglected my blog but kept cooking and I wish I shared all those with u .. Have been having some amazing homemade dishes these 2 months. Lots have happened in the 2 months went on a vacation, had a ball with my friends, moved to a new place, set up the new place and now back to my lovely food journal.. Plus now I am a 'lunch box-ing' wife so I have to constantly come up with healthy yet box-able recipes everyday and I am loving it. Actually I have become a healthy nut too now a days cos that's the only way to go in this fast foody cheesy gooey world. The truth I have gained quiet a few pounds in the last one year and I felt that is not doing me any good.Plus lots on my mind , thinking about giving this blog a new look ..hmm..

But today I am starting with a sweet indulgence. A sweet treat for those who love donuts. If you love donuts you will go crazy for these cos you do not have to drive or wait for the red 'HOT' sign to go up on krispy creme. It is a easy version of donuts no dough no, no kneading just some sweet indulgence for you and your family and its the perfect light desert to end a part or a get together.
All you need is a regular store bought biscuit dough and some fine granulated or confectionery sugar and some oil for frying.


I love donuts I used to eat them in boxes literally from Krispy kreme, its like you have taken a piece out of heaven so soft and perfectly sweet. I started to cut out those donuts slowly but I still had those sweet cravings at times and this was the perfect substitute for that store bought donuts. I have made these for my friends and they loved them. They take 10 minutes from fridge to the table and is a definite crowd pleaser. And I am sorry for my Indian friends cos I think you do not get the biscuit dough in India :( may be u get crescent dough I am not sure..

You can buy any store bought biscuit / crescent dough irrespective of the brand, and the result will be the same. Be careful when you get mini biscuit dough's, it takes only 30 seconds to cook. I am using Pillsbury crescent dough here. You can find the dough in near the butter / juice isle in most of the grocery stores.


10 Minute Donuts

Ingredients 
Store bought biscuit / crescent dough
Fine granulated sugar / confectionery sugar - 1/2 cup
Oil for deep fry

Method
Heat oil in deep bottomed pan
Open the biscuit can as per instructions and separate the dough.
Take a single piece of dough and poke it in the middle with your finger to make a hole ,like a donuts. (refer the pic)
Repeat the same for all the remaining dough.
Deep fry for 40 seconds on each side or golden brown for mini biscuits dough cook for 15 seconds each side.
Take out and sprinkle with 1 tbspn of sugar on both sides. 
Serve immediately.

Tuesday, March 26, 2013

Easy egg curry with coconut milk / தேங்காய் பால் முட்டை குழம்பு


Ingredients Serves 4
Eggs - 4 (can use boiled egg also)
Coconut milk / cream - 1 can / 400 ml or fresh coconut milk
Water - 2 cups
Tomato,chopped - 1/2,Medium
Pearl onion / small onion,peeled - 10 heads
Dry red chili,slit in the center - 2
Red chilly powder - 1 1/4 tbsp or according to taste
Curry leaf - 1 stem
Mustard seeds - 1/4 tsp
Coconut oil - 2 tbsp or can use regular oil
Roasted gram dal powder - 2 tbsp (optional) To know how to make it Click here
Salt as needed.

Method:
Heat oil in a pan and add the mustard seeds.
Once it pops add the curry leaf and the pearl onion and fry for 2 mins.
Add the chopped tomato and cook for 5 minutes and smash the tomato using the spoon.
Put the heat in medium ,add 1/4 cup of coconut milk,1 cup water, the chilly powder and the dry red chili and let it cook until it is reduced in half or cook until the raw chili powder smell is gone.
Add the remaining coconut milk, remaining water,salt and eggs and put the heat in low.
If you are not using boiled eggs- then break the eggs directly into the curry (or) if you are using pre boiled eggs, slash the egg whites slightly with a knife and drop them into the curry.
Do not stir if you are using raw eggs.Let the eggs cook for 5 minutes.
If the curry looks very runny , add the roasted gram dal powder and keep stirring in the other hand.
Close the lid and let it cook for 15 minutes in low heat.
Sprinkle with coriander.
Serve hot with rice.

Note:
The gram dal powder if not mixed well will form lumps, so use a tea strainer or icing sugar sprinkler to sprinkle and stir at the same time. It gives body to the curry ( a thickening agent). Do not use too much just around 1 - 2 tsp will be enough.
DO NOT cook on high heat, or else the coconut milk will curdle.


Saturday, March 23, 2013

Coriander pesto

On valentines day since I was doing 5 dishes so I kept the menu simple and this pesto was one of them. Everybody makes their own pesto and this one is mine and is easy on ur wallet as well.Usually pesto is made with basil and pine nuts, but I substituted coriander for basil and walnuts for pine nuts bcos simply they are cheaper and that's what I had in my pantry ! I make this pesto and store it in the fridge for almost a week. The flavor is so refreshing like a wave hitting you on a beach, and the fun part is it literally takes 5 minutes to prepare. Its every home cooks dream to finish off the cooking in 10 minutes and feed something healthy for the family.


Coriander pesto serves 3

Ingredients
Coriander with stems , chopped - 2 cups
Walnuts,chopped - 1/2 cup
Garlic, chopped - 2
Lemon juice - 2 to 3 tbs
Olive oil - 1/2 cup
Green chili, chopped - 1 (optional)
Salt to taste
Pepper to taste

Method:
Add all the ingredients to the blender and blend to a chunky paste. how easy is that!

Tips:
IF you want less oil add 1/4 cup of olive oil and feel free to add more lemon juice or 1 clove of garlic more.


Thursday, March 21, 2013

Eggplant fritters with roasted red pepper sauce

This recipe is a continuation from my last post Roasted red pepper sauce. This eggplant fritter was the appetizer II recipe on the valentines day surprise dinner. Theme Italian with absolutely no cheese.
Like I told before I tried to throw this surprise dinner with an Italian theme, since my husband is not a big fan of cheese I tried to venture to do a Italian dinner but with no cheese at all and I succeeded and to tell you the truth, I did not find any difference.
Today's recipe is an easy eggplant fritter with a roasted red pepper sauce.
For the sauce I used part store bought tomato sauce and roasted red pepper puree.
Sorry I do not have a great foto to post.

Salted eggplants


Egg plant fritter Serves 4

Ingredients
Eggplant / aubergine, cut into rounds- 8
Plain flour - 1/2 cup
Egg, beaten - 2
Panko bread crumbs - 1 cup or fresh homemade bread crumbs - 1 cup
Fresh / Dried oregano - 1/2 tbs
Fresh / Dried basil - 1/2 tbs
Pepper  to taste
salt to taste
Paper towels / towels - 6
Salt - 1/4 cup
Oil for deep frying

Preparing Eggplant:
Cut the eggplant into 1/2 inch rounds.
Sprinkle salt on both sides of the eggplant and place the eggplant on the paper towel and cover them with a paper towel. leave it for 15 minutes.
After 15 minutes change both the paper towels and leave it for another 20 minutes.
After 20 minutes pat the pat the eggplant dry for any moisture and excess salt.
This process is to draw out all the water from the eggplant so when we deep fry it, it will crisp up.

Cooking method:
Heat the oil in a deep dish for deep frying

Prepare a breading station:
Add salt and pepper to the flour and put them into a wide bowl
Beat the eggs add salt and pepper to taste and put them in a wide bowl.
Spread out 1/2 cup of the bread crumbs on a wide flat plate and add half of the dried basil and oregano.
Once the oil is hot, dip the eggplant in the flour, then the egg and then the bread crumbs and deep fry it for 1 to 2 minutes or until the bread crumbs are golden brown.
take out and lave it on a paper towel for excess oil to be absorbed.

Enjoy with the Roasted red pepper sauce or any sauce / dip you like.


Wednesday, March 20, 2013

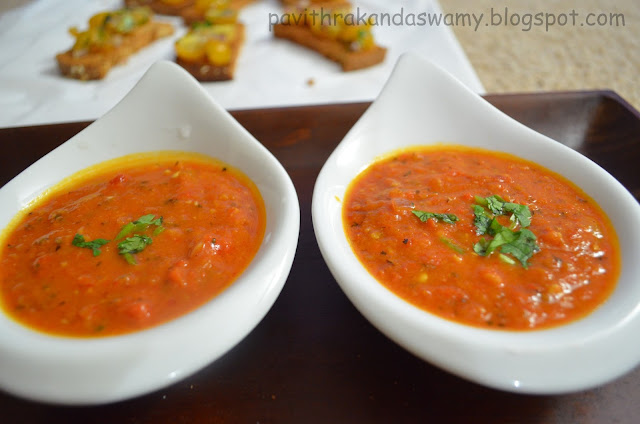
Roasted red pepper sauce - Dip

Ingredients:
Store bought pasta sauce (with herbs - optional)  - 1/2 cup
Red pepper whole - 1
Garlic, chopped finely - 3
Dried oregano - 1 tbs
Dried basil - 1 tbs
Ground pepper - 1/2 tbs
Red chilly flakes - 1/4 tbs
Garlic powder - 1/4 tbs
Olive oil - 2 tbs
Salt to taste
Coriander for garnish


Preparing the red pepper:
In the oven:
Preheat the oven to 500 f
Place the whole red peppers on a sheet pan and let it cook for 30 - 40 minutes until the peppers are completely charred and wrinkled.
Easy method on a gas stove top:
Turn on your gas to a medium heat, place the whole red pepper on the gas stove and let it get charred, keep turning from side to side until the whole pepper is completely charred.

Cooking method:
Hold the charred pepper under running water and remove the skin on the pepper.
Remove the seeds from the pepper and cut into chunks.Add the red pepper to a blender and blend it into a puree without any water.
Heat a pan with 2 tbs of oil, add the garlic and cook for a minute. Then add the blended pepper and fry for a couple of mins
Add the pasta sauce to it and cook for another 2 minutes.
Add the dried herbs and garlic powder, salt and pepper and cook it for 5 more minutes.
Remove from heat and serve with the Eggplant fritter or any other fritters you like.


Tuesday, March 19, 2013

Yellow cherry tomato bruschetta

I have been gone for a long time now.. Was caught up with other things in life.. Visited California and explored food to the fullest.. I ate so much that my stomach was about to blow up and when I left LA my jeans wouldn't fit me! 
So back to normal life and back to blogging.. Today's recipe is one among the Valentines day special - No cheese Italian. I made this recipe on Valentines day for my husband. The theme was Italian with absolutely no cheese.
This recipe is so easy to prepare, colorful to look at and yummy to taste. I used yellow cherry tomato for this recipe. The recipe has very few ingredients to use and I consider it a Semi-homemade recipe bcos all we have to do is prep the ingredients and ready to munch on it.


I am using fresh  bread and drying it out in the oven to make it crispy or you can buy dried out bread / rusk from the store. I am using wheat bread in this recipe since I ran out of white bread, I recommend using white bread for this recipe. You can do this recipe with all the ingredients you have at home.I threw this surprise valentine dinner with only all the things I had at home, no special shopping of any kind.


Yellow cherry tomato bruschetta Serves 2- 3

White bread / rusk / dried out bread slices - 4
Yellow cherry tomato,chopped - 1 cup
Red onion  chopped finely - little less than 1/4 cup 
Coriander, chopped with stems - 3 tbs
Dried oregano - 1/2 tbs
Dried basil - 1/2 tbs
Garlic powder - 1/4 tbs
Pepper powder - 1/4 tbs
Chilly flakes - 1/4 tbs
Olive oil - 1 to 1/5  tbs
Salt to taste

Preparing the bread:
Preheat the oven to 350 F
If you are using fresh bread cut it into equal rectangles, you might get 3 slices if your bread is large or just cut it into equal halves.
You can either take of the crust or choose to keep it. It depends entirely on you.
Place the bread slices on a sheet tray, 1 inch apart.
Put it in the oven for 4 minutes, take out turn the slices and put it in the oven for again  3-4 minutes.
Check the slices after 3 minutes, if they start to change color remove them, if not leave it in the oven for 1 more minute.
Note: We want to dry the bread out, so it becomes crispy but don't want the bread to change color
You can skip this step by buying dried bread slices from store.

Method:
Cut the cherry tomatoes in to halves or into quarters, add them to a bowl.
Add the other ingredients to the bowl  excluding oil and mix them together until combined.
Add the olive oil and toss them together.
Let it sit for half an hour.
Place 2 tbs of the marinated tomatoes on top of the crispy bread and serve.


Sunday, March 3, 2013

Valentine special - Drink - Sunset vodka

This is our first Valentines day so I decided to surprise my husband with a beautiful candle light dinner on valentines day. I wanted to go Italian but with NO CHEESE at all. I love Italian food so does my husband but he hates cheese. When we go to restaurants he removes the cheese and eats his food. So I wanted to give him light Italian food without any cheese at all and at the same time which are easy to cook. So I resorted to Sunset vodka for the drink, Sunrise yellow tomato bruschetta, Crispy eggplant fritters with roasted red bell pepper sauce and Paste 2 ways (Cilantro pesto and tomato n basil sauce). I know it seems so much but trust me these are so light that they will serve only two.
I have a lot of work to do and was praying he should not come home early, cos I will be caught doing all the arrangements. But everything went as planed and when he opened the door the whole living room was lit with candles and a wonderful table set. He was truly surprised and we had a wonderful dinner. He enjoyed the food a lot and at the end there was absolutely no food left. I decided to serve my recipes with you all bcos these are tasty Italian food with absolutely no cheese at all but you wont feel the difference. To start with I am starting with my drink recipe sunset vodka.


Sunset vodka Serves 2

Ingredients:
Orange juice - 2 cups
Vodka - 1 cup
Grenadine rose syrup - 2 - 3 tbsp
Lemon juice - a dash (optional)
Simple sugar syrup - Sugar 3 tbsp + 3 tsp of water 
Ice cubes
Lemon slice for garnish

Method:
Put a small pan on heat add the sugar and water and stir until dissolved.Cool it and keep it aside.
Add orange juice and vodka and stir.
In a cocktail glass fill with ice cubes and add the orange juice mixture.
Add one table spoon of grenadine ( DO NOT STIR). the grenadine will go down and it will have a beautiful visual appeal.

Tips:
You can increase the vodka by another 1/4 cup if you want a strong drink or 
If you want a mild refreshing drink decrease the vodka by 1/4 cup.
If you want more sweetness increase the sugar in the sugar syrup by 1 tbsp and make it 4 tbsp.


Wednesday, February 27, 2013

Cucumber stir-fry with kimchi

I don't eat much cucumber, I wanted to find a way to eat more cucumber so I kinda put all the ingredients I like and I created this stir fry. and Since I  was doing Korean pancakes, I wanted some Korean dish to go with it. What is more Korean than kimchi??? so I decided to so the stir fry with kimchi.

For those who do not know about kimchi, it is basically a fermented / picked cabbage. This kimchi is a Korean favorite and now a days you can even find kimchi pizza's in some specialty pizzeria's.It is tangy and sour and the cabbage still will be crunchy, if you have never had kimchi before the first few bites will be very tangy but once you get used to it you will love it. My friend visited me and I gave her the kimchi and she was not a big fan when she first tasted it but after a few bites she asked for a second serving. so if you like sour food then you will love kimchi. You will find kimchi in all grocery stores or in any Asian store. You can eat this as a side or just as a snack.Its good when it is hot and even cold. I have garnished with coriander stems which give this dish robust fresh burst of coriander flavor.

If you dont have kimchi, you can do the same recipe without kimchi.

Name: Sun yum kimchee
Availability: Any grocery or Asian grocery store
Price: 3$
Recommendation: Yes


Cucumber stir-fry with kimchi Serves 2

Ingredients:
Kimchi,store bought, chopped - 1/4 cup
Cucumber -1
Onion , chopped small - 1/4 cup

Ginger, diced finely - 1/2 tbs
Garlic, diced finely - 2

Green chili chopped finely - 1
Soy sauce - 1 tbs
Vinegar - 1/4 tbs
Coriander stem, chopped - 1 tbs for garnishing
Salt to taste if needed
Oil - 1 tbs
Spoon to clean out the cucumber seeds.

Method:
Slit cucumber lengthwise and using a spoon scoop out the seeds and chop them into the semi circle rounds or in any shape and size you want.
In a pan heat 1 tbs oil and add the onion and green chili and fry it for 1 minute until the onion is translucent.
Add the ginger and garlic and cook in medium heat for 2 more minutes.
Add the kimchi, soy sauce, vinegar and cook for 1 minute.
Add cucumber and salt if needed, toss around and cook for 2 more minutes, so the cucumber still has some crunch.
Serve hot or cold with Korean pancakes.


Tips:
You can cook cucumber what ever way you like. If you want the cucumber to be soft cook for 5 minutes.
If you do not have kimchi you can do the same recipe without kimchi.


Monday, February 25, 2013

Korean pancakes - healthy pancake with vegetables

I was bored with sweet pancakes, I love crepes comparing to pancakes, even though both are basically pancakes.. I wanted to do a vegetarian one and I came across this Korean pancake with veggies. Its so easy to make and its just the regular pancake batter but with veggies and no sugar. It is a kid friendly dish .Since the pancake needs some sauce or something to go with it I decided to serve it with some kimchi cucumber stir fry. (recipe in the next post).


Korean pancake Makes 10 medium size pancakes

Ingredients
Plain flour - 2 cups
Water - 2 cups
Baking powder - pinch (optional)
Egg - 1
salt - 1/4 teaspoon
Yellow squash sliced thinly - 1/4 cup
zucchini sliced thinly - 1/4 cup
Red bell pepper (capsicum) - 1/4 cup
Spring onion chopped - 5 stalks
oil / butter for frying 

Method:
In a mixing pan add plain flour,baking powder,salt, egg and water. Mix them well without any lumps.
Add all the chopped veggies and mix in the patter.
Heat a griddle / tava / non stick pancake pan add 1 tbsp of oil and pour one ladle of the mixture. after a minute turn it over and cook for one more minute.
Serve hot or cold with any sauce you like or serve with the cucumber stir fry with kimchi.


Saturday, February 23, 2013

Don't throw away your coriander / cilantro / parsley stems

Are you throwing away your coriander stems?You are throwing away all your money and your flavor. There is such intense flavor in those stems.When you buy coriander,take a sniff at the stems and the leaves and I promise the stems will smell a heavenly coriander than the leaves and you will never throw them away again..


Some of us Indians, just use coriander for garnishing, but the small green leaves and stems can give us much more than garnishing, and some people doesn't know what to do with them and they rot in the fridge, I have been one of those and I also tried drying it out but they just don't cut it. Fresh coriander is the best.

Preserving coriander:
Coriander hates moisture and if there is moisture it starts to go bad.
  • When you buy them put them in a jar half filled with water, just to cover the ends of the stem, this helps them to stay fresh, but use them on the same day.
  • If you are not going to use it a day,put them in a airtight cover / zip lock and put them in the lower basket on the fridge.
  • If you are not using it for a week, change the cover / zip lock every 2 days,to keep them fresh. after 2 days you can see the moisture built up inside the cover / zip lock. That's why we are changing it every 2 days or
  • Put them in a air tight container and store them in fridge, every 2 days take the box out and wipe all the moisture built up in it and gain put them back in the box and back to the fridge or
  • Make them into a paste or pesto and preserve them in the fridge for a week.( recipes of pesto and paste will be updated soon

Uses for the stems:
Use them when blending biriyani masala
Use them when grinding chutneys
Use them along with leaves when making pesto
Chop them finely and add it as garnish for your meat, it goes so well with meat.

My recipes with the stems:
White sesame chutney recipe where I have used the stems while blending the masala.
Cucumber stir fry with kimchi where I have used the stems for garnish
Coriander paste ( will be updated)

Use stems add flavor to ur food and save money..


Friday, February 22, 2013

White Sesame chutney


Ingredients: Serves 4 
White sesame - 1/2 cup
Split black gram / Ulutham parupu - 3 tbs
Coconut grated fresh / dry coconut - 1/4 cup
Dry red chili - 3 or 4 according to ur aste
Coriander stems, chopped - 3 tbs
Tamarind pulp - small lemon size + Water - 2 tbs
Water - 1/4 cup
Salt to taste
For tempering:
Mustard seeds - 1/4 tsp
Curry leaf 1/2 stalk

Preparations:
Soak tamarind in the 2 tbs of water.
Dry roast the sesame seeds and black gram / Ulundhu until golden. Keep aside.
IF USING DRY COCONUT: dry roast the grate dry coconut and add it to the sesame seed mixture.
IF USING FRESH COCONUT : Add it directly to the toasted sesame seed mixture.


Method:
Using your hand dissolve the soaked tamarind in water,until all the flesh dissolves.
In a blender add the toasted sesame seed + ulundu mixture, the coconut, the red chili, the coriander stems,tamarind water and salt grind to a paste.If the mixture is dry add water to your desired consistency
In another pan heat 2 tbs of oil, once oil is hot add the mustard seeds and let them pop,switch off heat add curry leaf and add the mixture to the chutney and stir.

Tips:
If you find the taste very intensive or bitter you can add more tamarind to balance that.


Wednesday, February 20, 2013

Vindaloo Simmer sauce by Archer farms

I tried Vindaloo sauce by Archer farms and it was yummmyyy.. It is the masala blend and all you have to add is meat or potato. I tried it with chicken.Vindaloo is a famous east Indian recipe and is vinegar based sauce, so it is tangy.Hence, I added green chili to make it spicy plus some onion and tomato for some texture and extra flavor  It was so good with roti. I loved it and my husband loved it.This is a perfect curry for those who feels that Indian food is complex and are intimidated by spices.
It is perfect for a lazy day curry where you don't have to do all the work yourself. The taste feels so homemade and it is worth the money. 

The recipe Follows...

Name:Vindaloo simmer sauce by archer farms
Availability: Target
Cost: about 5$
Weight: 13.2oz
Recommendation: Yes


Chicken vindaloo Curry  Serves 4 - 5

Ingredients:
Vindaloo simmer sauce - 1
Chicken, boneless, cut into bite size pieces - 1 to 11/4 cup
Onion, sliced - 1 big
Tomato, chopped - 1/2 medium
Green chilly, slit length wise - 5 or less according to your taste
Water - 2 to 3 cups
Oil - 2 tbsp
Salt to taste

Method:
Put pan on heat, add oil and onion and green chili.
Let the onion cook and caramelize  this may take about 3-5 minutes.Add tomato close the lid and cook for 3 minutes. Smash the tomato with the spoon.
Add the simmer sauce to the onion mixture and let it cook for another 5-7 minutes.
Add the cleaned and cubed chicken and toss it around for 2 minutes.
Add 2 cups water( if you want you can pour water into the sauce bottle and pour the water to the pan, as the water will bring any remaining sauce stuck to the bottle.)
You can add the other cup of water depending on what consistency you want the curry to be.
Taste and add salt accordingly.
Close the pan with the lid and let it cook for 15 - 20 minutes.
Serve hot with roti / rice